


Composting at Home
Notes prepared by Kat Lavers, May 2024
What is compost and what can it do?
Compost is organic matter – anything that has lived before – decomposed, concentrated and stabilised by microorganisms and other critters into a stable form ready to be used by plants. It looks like crumbs of a rich chocolate cake and smells pleasantly earthy. In an organic garden, compost has many important functions including:
• Adding nutrients to feed plants
• Building better soil structure which improves drainage and holds moisture (perfect for both clay and sandy soils!)
• Balancing pH in acid or alkaline soils
• Inoculating soil with beneficial microbes that are essential for healthy plants
• Binding or degrading heavy metals, toxins and pollutants, reducing their absorption into food chain.
Compost is also an important way to reduce your household waste and prevent greenhouse gas emissions from organic matter in landfill. And if you can make great compost, you can grow great produce…
Getting started
Compost happens! The microbes that do the work are just as happy in a pile directly on the ground as they are in a fancy designer compost bin. Containers are not always necessary, but are sometimes useful to prevent lighter materials from blowing away, insulate the pile for faster breakdown, prevent heavy rain from leaching nutrients and keep out rodents and other animals. If you live in a rental and/or apartment/unit, 20L food grade plastic buckets with holes drilled in the base and lid are a scalable, portable system that can move house with you.
A portable rental compost system
Upcycled 20L food grade plastic buckets can be upcycled into a compost system that can be scaled up easily by adding more buckets, and easily moved between houses.
To convert a bucket, drill 30 x 3mm holes in the top lid, drill a few 3mm holes in the bottom of the bucket to allow worms in but not rodents, plus 4 more around the sides close to the base.
Every time you add food scraps, cover with a thin layer of sawdust (mixed with a little soil/compost if you have it). You can add up to ½ cup water occasionally to keep it damp if needed. Aerate every few weeks with a compost screw (or shake/roll the bucket if the lid is tight!), and you will have finished compost in 3-6 months.
What can you put in compost?
Common ingredients are kitchen scraps, autumn leaves, grass clippings, prunings, newspaper and cardboard and straw. Confusion and conflicting information often stems from ‘hot compost’ (see below), which can accept a much wider range of materials including rice, pasta, bread, citrus, fats and oils and meat. A well-managed smaller, cooler, slower home compost system can manage small quantities, but these materials are best avoided by beginners. Fats, dairy and meats are likely to attract vermin. Eggshells and avocado seeds and skins may not fully decompose but are not harmful to your compost or plants. Some people use compost activators or additives such as healthy soil, wood ash, garden lime and herbs. Experiment of course but rest assured that none of these are essential to creating a healthy compost heap.
While the power of compost to degrade toxic chemicals and bind heavy metals is incredible, obviously avoid adding these to your compost. In particular avoid woodchips or sawdust from treated, painted or varnished timber, glossy magazines and newspapers with non-vegetable-based inks. Never add cat or dog manures to compost intended for edible plants as these can transfer harmful pathogens to humans. Also avoid adding weedy plants or grasses that could regenerate from seeds, roots or rhizomes.

Making hot compost
Compost can become hot when microbes in the pile breed rapidly and the pile is large enough to retain the heat they produce. A hot compost pile can easily reach 80ºC, but we aim to keep it at 60- 65ºC to preserve beneficial microbes in the pile. This extra heat rapidly decomposes even ‘tough’ organic materials like weed seeds, waxed cardboard, oils and fats, small twigs, whole pumpkins – even animal bodies! The volume of a hot compost pile must be at least a cubic metre (or insulated), with a well balanced ratio of carbon to nitrogen materials, and the right moisture and oxygen content to build up heat. When turning try to invert the pile so the hotter core is moved to the cooler outside, and vice versa. Hot compost can be finished in as little as 4 weeks, but because of the sheer volume of materials and extra effort required, home gardeners usually do not make hot compost.

Carbon and Nitrogen: you need a balance!
The microbes in your pile need a balanced diet of carbon and nitrogen. You will read that the ideal ratio is about 25 parts carbon to 1 part nitrogen, but in practice a rough volume ratio is far more useful. The recipe I use for basic home composting is an equal volume of nitrogen and carbon materials. In other words, for every bucket of kitchen scraps you add, always add a bucket of carbon materials on top. Note that you’ll need to adjust this ratio if you choose extremely rich sources of either carbon or nitrogen (see table below). Keep your layers about 10cm think for most materials, but only 3cm thick for extremely rich materials like poultry
manure or wood shavings.
It’s important to maintain a supply of carbon materials next to your compost heap so it’s super convenient to add the layer on top when you empty your kitchen scraps. And remember to always cover the nitrogen layer with the carbon layer to prevent smells and avoid attracting flies and animals.
Is this material a source of carbon or nitrogen?
An easy rule of thumb is to imagine the material sitting in a pile exposed to rain for many months – if it would smell bad it’s a source of nitrogen, if it would smell ok or not at all it’s a source of carbon.
| Extremely rich N | Nitrogen | Carbon | Extremely rich C |
|---|---|---|---|
| Poultry manure | Green leaves | Autumn leaves | Sawdust |
| Blood & bone | Grass clippings | Shredded paper | Wood shavings |
| Human urine | Food scraps | Wheat straw | |
| Lucerne/pea straw | Cardboard | ||
| Newspaper | |||

Other essentials: moisture and air
The beneficial organisms in your compost pile must have air to survive. If conditions are anaerobic (without oxygen), your compost will release smelly gases and materials will not break down. Turning a compost heap can add air and ensure faster and more even decomposition, but turning compost is hard work and usually unnecessary for small home compost piles. An easier alternative is to ‘fluff’ the pile with a compost screw or garden fork every few weeks.
Living organisms also need water. If the pile is too dry, they will stop working. A moisture content of about 50% is ideal for microbes to operate. This is equivalent to a
damp kitchen sponge, an easy test is to squeeze handful of your compost materials which should release a single drip of moisture. Unless your materials are very sloppy, you may need to occasionally add water to maintain moisture levels. Conversely if the pile is too wet, air spaces in the pile become clogged and can reduce oxygen. Covering the pile during periods of heavy rain will also prevent leaching of soluble nutrients.
Troubleshooting
Getting the balance right first time can seem tricky but with a little practice you’ll be able to ‘read’ your compost and adjust your pile later if needed. Here’s what to look for:
| What you notice… | … and what it means |
|---|---|
Compost is not decomposing, smells bad, and is warm or hot in centre | There is probably too much nitrogen in the pile relative to carbon. Aerate the pile to increase oxygen and mix in carbon-rich materials. Also cover the surface with carbon-rich materials and stop adding materials until the smell disappears. |
Compost is not decomposing, smells bad, but is not warm in centre | Can indicate insufficient oxygen or too much water, or both. Aerate the pile, ensure good drainage, cover the pile if it is likely to rain heavily and mix in dry carbon materials to absorb excess water. Also cover the surface with carbon-rich materials and stop adding materials until the smell disappears. |
Compost does not decompose but smells ok and feels dry | There is not enough moisture in the pile. Add water until a squeezed handful feels like a damp kitchen sponge. |
| Compost does not decompose but smells ok and feels moist | There is not enough nitrogen in the pile relative to carbon. Mix in nitrogenrich materials. |
Some materials not decomposing but compost smells ok, looks fluffy, is moist and has good C:N balance | These materials may be very resistant to decomposition (eg. avocado stones, eggshells). If materials usually decompose readily, suspect toxins and remove them. |
Ants nesting in compost | Ants are not necessarily a problem but can indicate that your compost is too dry – check moisture of pile. They may also be attracted to sweet or protein-rich materials. |
Vinegar flies (tiny flies hovering around the pile) | Vinegar flies indicate nitrogen-rich materials are on the surface of the pile, there is poor C:N balance or not enough oxygen. Act fast as they can quickly build up populations. Aerate compost, make sure the pile is covered by a layer of carbon-rich materials such as shredded paper, cardboard, straw or autumn leaves and possibly mix some of these in too in the balance seems wrong. Stop adding materials until vinegar flies disappear. Make traps with ¼ cup vinegar, ¼ cup water and a few drops of dishwashing liquid and place around and inside compost bin. |
Rodents in or around pile | Avoid adding meat, fat or dairy to compost. Make sure nitrogen-rich materials are covered by carbon-rich materials. Block access to the compost using weldmesh (<10mm holes) or use an enclosed bucket system. Compost that is turned regularly will deter nesting in the pile. |
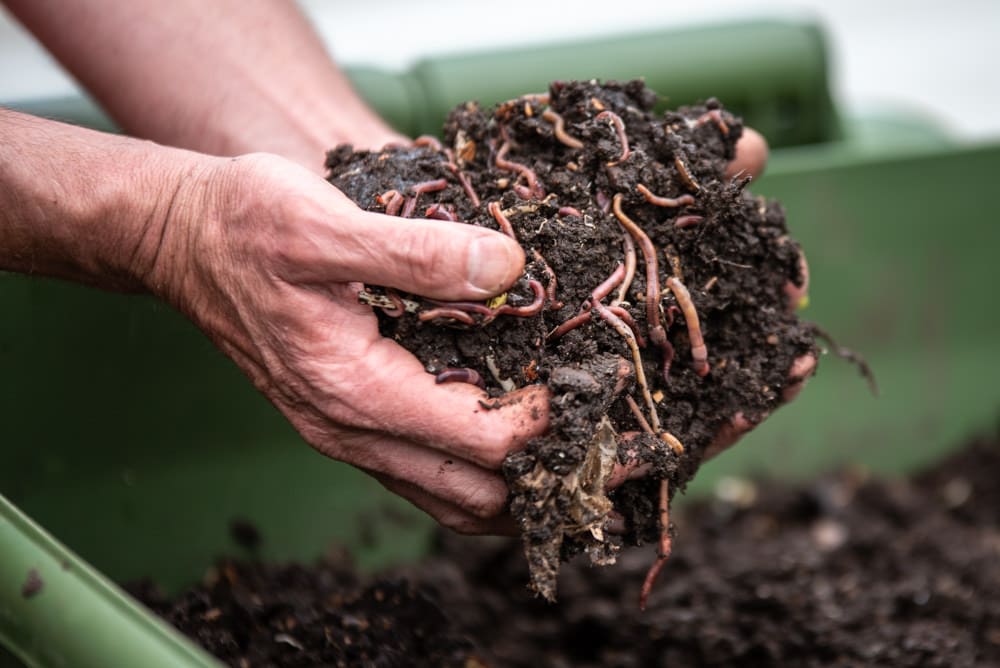
Worms, beetles, mites, slugs, slaters etc | Don’t worry about other critters – diversity is a good thing! All these creatures have important roles to play in decomposition. |
When will my compost be ready?
Your compost is ready when it is crumbly, dark brown and smells pleasantly earthy. How long this takes depends on how you manage your pile. Well-balanced home compost with good aeration can produce finished compost in as little as 2-3 months, while slower piles can take up to a year. 6 months is about average for a useful quantity of compost. Compost made from kitchen scraps added bit by bit will start maturing from the bottom of the pile. To harvest you can scrape out this finished compost and continue adding to the same pile, or you can start a new pile and wait for the entire original pile to mature.
So in a nutshell…
- Site your compost somewhere convenient and make sure you keep a supply of carbon-rich materials next to the pile. Start every pile with a layer of carbon.
- Add most materials in 10cm layers, and use an equal volume of carbon and nitrogen materials with the carbon layer always on top. Very rich materials like poultry manure and sawdust should be added in very thin layers of about 3cm.
- Every few weeks check the moisture of your pile and fluff up with a compost screw or garden fork. Adjust balance of materials if necessary.
- You should have compost in about 6 months. If you can make great compost, you can grow great food!
Further reading
Handreck, K. 2001. “Gardening Down Under: a guide to healthier soils and plants”, CSIRO Publishing. Lowenfels, J. and Lewis, W. 2006. “Teaming with Microbes: a gardener’s guide to the soil food web”, Timber Press.