


Veggie Growing – Beyond the basics
Notes prepared by Maria Ciavarella, My Green Garden, March 2025
Here are more notes from Maria from My Green Garden about techniques beyond the basics of vegetable growing. This article covers crop rotation and planning a winter vegetable garden. You can also watch the webinar recording in the Videos section of our website.
Crop Rotation in the Veggie Patch
Rotating where you plant vegies from one season to another is important for 2 main reasons:
- It cycles nutrients from season to season in the soil, so one crop helps the following; and
- It stops the build up of plant diseases in the soil that might otherwise harm plants if they were planted in the same place in consecutive years.
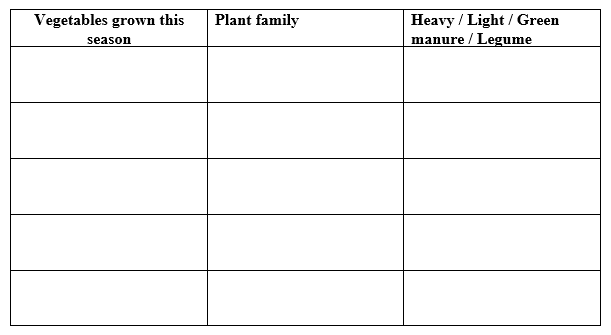
There are many suggested ways to rotate crops and they can be confusing, as it depends on how many vegie beds you have and the types of plants you have been growing.
The following method is one that is easy to follow. More detail can be found on the website of Sustainable Gardening Australia (https://www.sgaonline.org.au/crop-rotation/). It is based on the nutrient needs of the plants and groups them into 4 basic categories.
Group 1: HEAVY FEEDERS
Includes:
Solanacae: potatoes, tomatoes, eggplants, capsicum, chilli
Cucurbits: zucchini, pumpkins, cucumbers, squash
Brassicas: Asian greens, broccoli, cabbages, cauliflower, rocket, mustard greens
Leafy Greens: Lettuces, spinach,coriander, basil
Others: sweetcorn, lettuces
Group 2: LIGHT FEEDERS
Includes:
Alliums: onions, leeks, garlic, spring onions, shallots
Root vegies: beetroot, carrots, radishes, Jerusalem artichokes
Group 3: GREEN MANURES (living manures)
Green manures act like adding manure to your soil, only better! They are grown to feed the soil, rather than a crop for you to eat. They are a seed mix of legumes, to add nitrogen to the soil; and bulky grassy species, such as oats and rye. When these are allowed to grow and then slashed and lightly dug into the soil, they break down to nourish the soil and add valuable organic matter to enrich the soil before the next crop. Leave them to decompose for about 4 weeks before planting the Heavy Feeder crop.
Group 4: LEGUMES
Any of the peas and beans family, including snow peas, peas and broadbeans grown over winter; and beans over summer.
Rotation
The order of rotation is as follows:
After harvesting the HEAVY FEEDERS, next season plant LIGHT FEEDERS in the bed. A top-up with some compost or cow manure/mushroom compost is a good idea but don’t overdo the manures, otherwise the root vegies won’t develop properly, putting on leafy growth at the expense of the root development.
After a crop of LIGHT FEEDERS, follow it with a GREEN MANURE crop. Leave this to grow until it is about knee-high, or just before it starts to flower and then slash it down and leave it to break down on the surface or lightly fork it through the soil.
After the GREEN MANURE, plant out some LEGUMES. (After harvesting the legumes, resist the temptation to pull out the entire plant. Instead, cut the plants to the ground and allow the roots to break down in the soil as they have stored nitrogen and attract valuable soil micro-flora).
After the LEGUMES, you can now plant the HEAVY FEEDERS once again. You will need to enrich the soil significantly with some organic fertiliser but the legumes will have also helped the soil and have left a pH that helps with the heavy feeders. If possible, don’t plant the heavy feeders from the same family as was previously planted here, at least for 3-4 years.
It does take some planning to carry all of this out but, by keeping a planting plan diary, you will remember what was planted where over the years. At the very least, avoid planting the heavy feeders from the same families in the same beds in consecutive years. Particularly problematic are the members of the Solanacae family and the Brassicas.
Winter Vegetable Gardening
GARDEN BED PREPARATION
If you already had vegies growing over summer, they may not be ready to come out in order to put the new season’s growth in. No matter – there is still plenty to do. You can start the winter vegies as seeds ready to plant out as seedlings when your summer crops are finished. Once you have removed the summer vegies, add some more organic matter to the soil in the form of composts and manures and a good dose of an organic fertiliser, such as blood and bone or Dynamic Lifter. Water it all in well and then wait for a couple of weeks for the soil to settle.
If you are planting in pots, choose vegie varieties suitable for container growing and buy the best quality potting mix you can afford. Plants will struggle in cheap potting mixes. Keep the pots watered well and in a position where they receive at least 5-6 hours of direct sunlight a day.
| Plant Family | Easy Grow | Soil Preperation | Pest Problems | On-going Care |
|---|---|---|---|---|
| Brassica | Brocolli | Compost and/or cow manure or mushroom compost Organic fertiliser | Snails Cabbage white moths Earwigs | Feed with liquid organic fertiliser every 2 weeks |
| Cabbage | ||||
| Kale | ||||
| Asian Greens | ||||
| Herbs | Coriander | Compost and/or cow manure or mushroom compost Organic fertiliser | Snails | Feed with liquid organic fertiliser every 2 weeks |
| Parsley | ||||
| Dill | ||||
| Leafy vegetables | Lettuce | Compost and/or cow manure or mushroom compost Organic fertiliser | Snails | Feed with liquid organic fertiliser every 2 weeks |
| Silverbeet | ||||
| Spinach | ||||
| Rocket | ||||
| Alliums | Garlic | Compost and/or cow manure or mushroom compost | Black aphids | Put in a well-drained bed. Be patient! Garlic and shallots may take up to 8-10 months to mature. |
| Spring onions | ||||
| Salad Onions | ||||
| Shallots | ||||
| Legumes | Board beans | Compost and/or cow manure or mushroom compost Organic fertiliser Add lime before planting | Snails when plants are small | Provide stakes or trellis for tall growing varities. |
| Snow peas | ||||
| Root vegetables | Carrots | Compost and/or cow manure or mushroom compost | Plant by April before the soil cools down Do not fertilise while growing |
|
| Radishes | ||||
| Beetroot |